JBank Staking: Step-by-Step Tutorial (No KYC Required)
 BitradeX Referrer
Disclaimer: This website and its content are for informational and educational purposes only and do not constitute investment advice.
Important Information, Risk Disclosures, and Disclaimers
"I want to start JBank, but dealing with crypto assets seems too difficult..." Are you feeling worried about this?
JBank is a highly anticipated Web3 project, but the process can feel a bit complicated if you don't know the proper steps.
In this article, we will guide you through the simplest, mistake-free "shortest path to get started and manage your staking."
By following this guide step-by-step, even complete beginners can smoothly start staking and earning rewards.
💡 Special Promotion Notice
If you connect your wallet using the invitation link below, you will receive a free gift of BNB (for gas fees) required to start staking, along with personalized setup support!👉 Click here for the JBANK Invitation Link
(Copy and paste this into your crypto wallet's browser):
https://jbank.pro/invite?referrer=0xc93f41B095525314bbDD0e31de2d3B5Dd513FE81
※ Detailed instructions on how to use the invitation link are covered in STEP 4. If you would like to receive free BNB or need hands-on support for registration and staking, please feel free to reach out to us through either of the channels below:
If you wish to contact us via WhatsApp, please click the button below.
If you wish to contact us via WhatsApp, please scan the QR code below.

Please click the button below to contact us via email.
We know that setting up and staking can feel overwhelming, so please don't hesitate to reach out for a consultation!
6 Steps to Get Started with JBank
Let's first take a look at the big picture. Just follow these steps in order, and you'll be good to go:
- Open an account on a crypto exchange (BitradeX)
- Create a crypto wallet
- Prepare BNB
- Connect to JBank via the invitation link in your wallet
- Send USDT (staking funds) to your wallet
- Swap USDT to JUP and start staking (earning rewards)!
[STEP 1] Open an Account on a Crypto Exchange (BitradeX)
If you don't own any cryptocurrency yet, you will need to register on BitradeX to prepare your digital assets.
Please refer to the article below for registration steps.
BitradeX Start Guide: How to Open an Account, Deposit, Withdraw, and Exchange Fees Explained
Master BitradeX with our comprehensive start guide! Learn how to open an account, pass KYC, and set up 2FA security. We also explain deposit/withdrawal fees, t…
 Cryptocurrency Info
[STEP 2] Create a Crypto Wallet
Next, you need to create a non-custodial cryptocurrency wallet.
We highly recommend creating a TP Wallet (TokenPocket) for this process, though MetaMask works perfectly fine too.

Search for "TP Wallet" in your app store and install it.
Once installed and opened, you will see the initial setup screen.
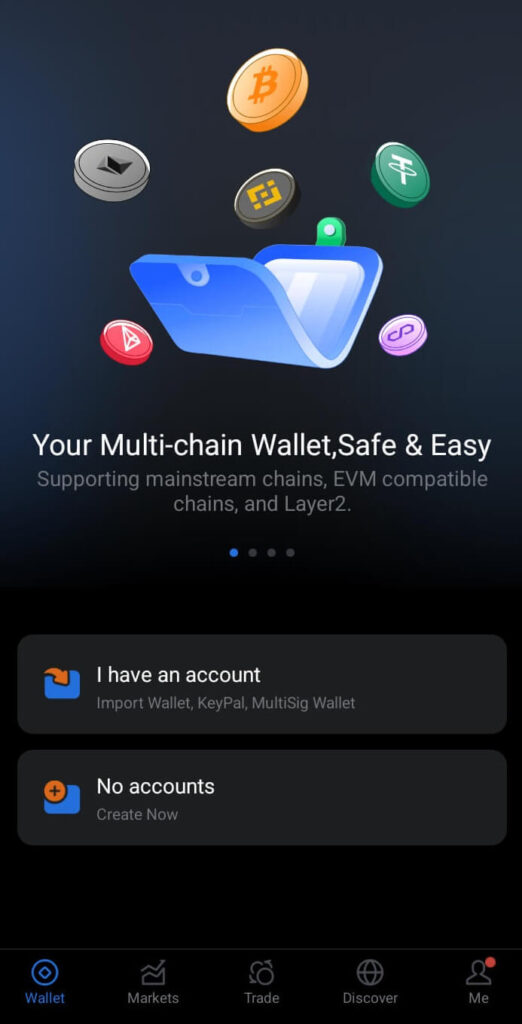
If you want to import an existing wallet, select "I have an account"
If you are creating a wallet for the first time, select "No accounts"
For this guide, we assume you are creating a wallet for the first time, so select "No accounts."
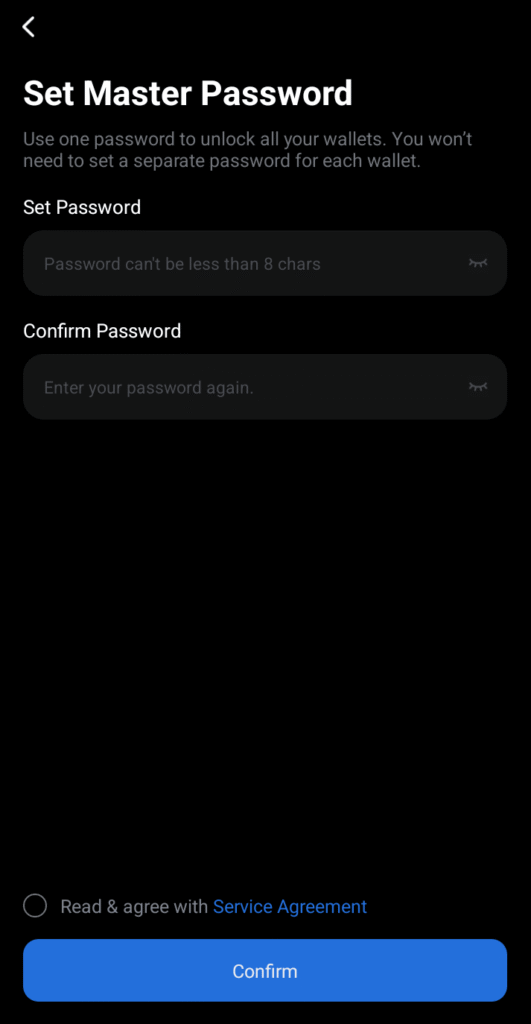
Set up your secure login password.
Tap "Read & agree with Service Agreement" to check the box.
Tap "Confirm" and you will be directed to the network selection screen.
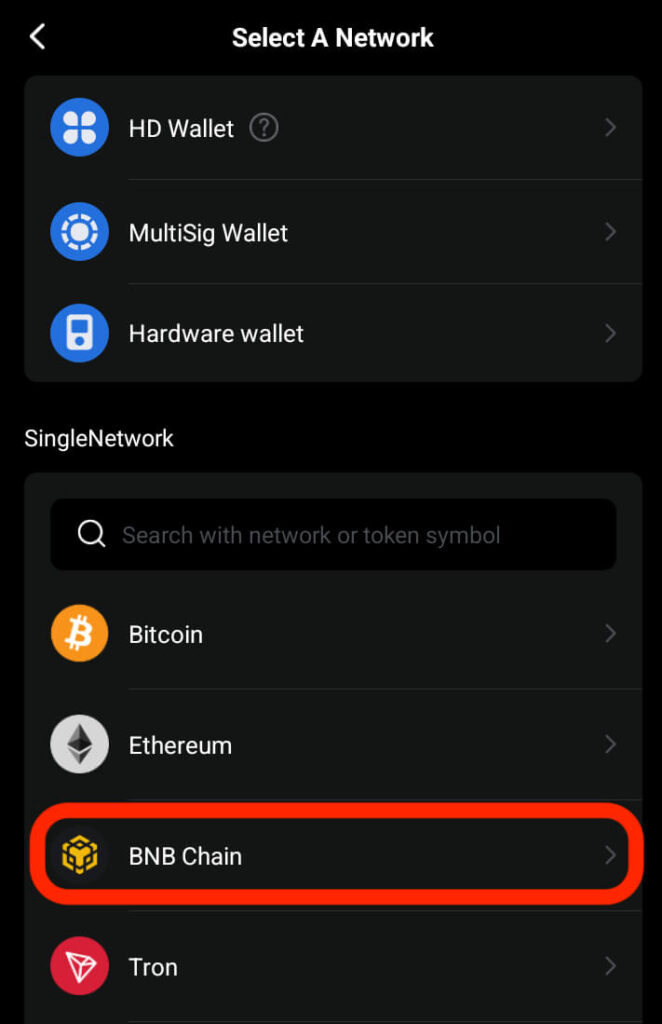
From the "Single Network" list, select "BNB Chain."
Enter a "Wallet Name." (It defaults to "BNB-1", which is perfectly fine to leave as is).
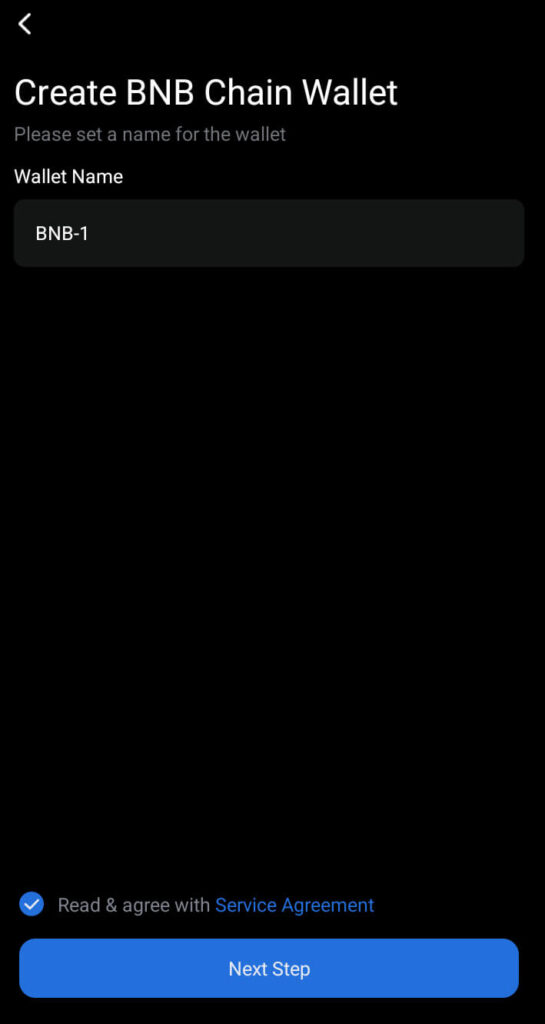
Check the box for "Read & agree with Service Agreement" and tap "Next Step."
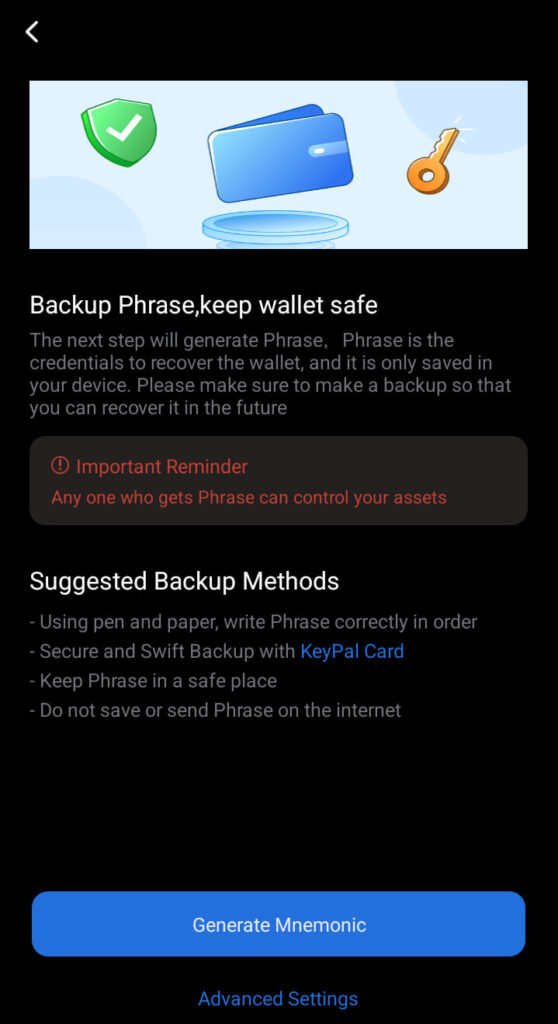
Tap "Generate Mnemonic."
Tap "Tap to display recovery phrase" to display the 12 words.
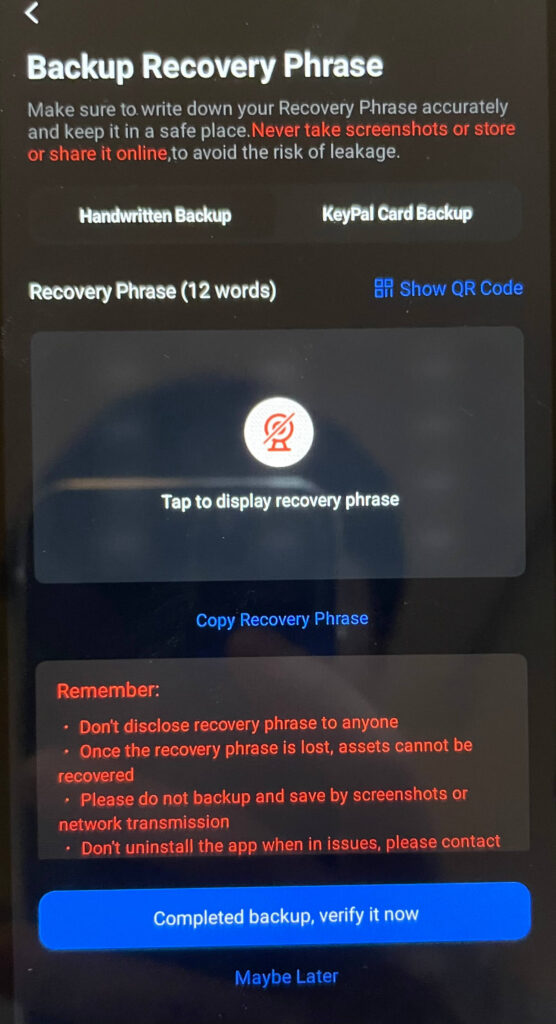
Write these words down securely somewhere offline, and then tap "Completed backup, verify it now."
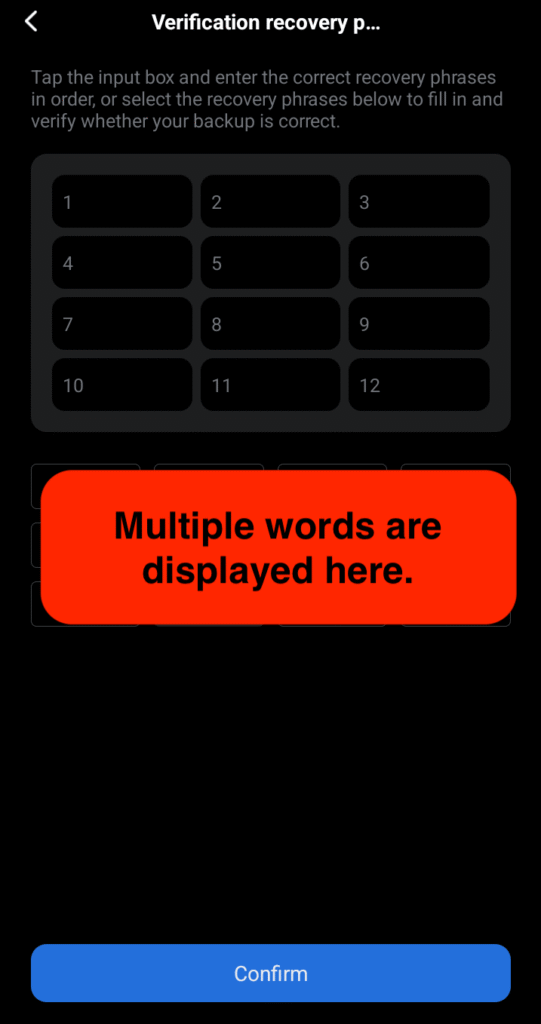
Select the words from the list at the bottom of the screen in the exact order they appeared.
Finally, tap "Confirm."
Congratulations!
You have successfully created your BNB Chain wallet.
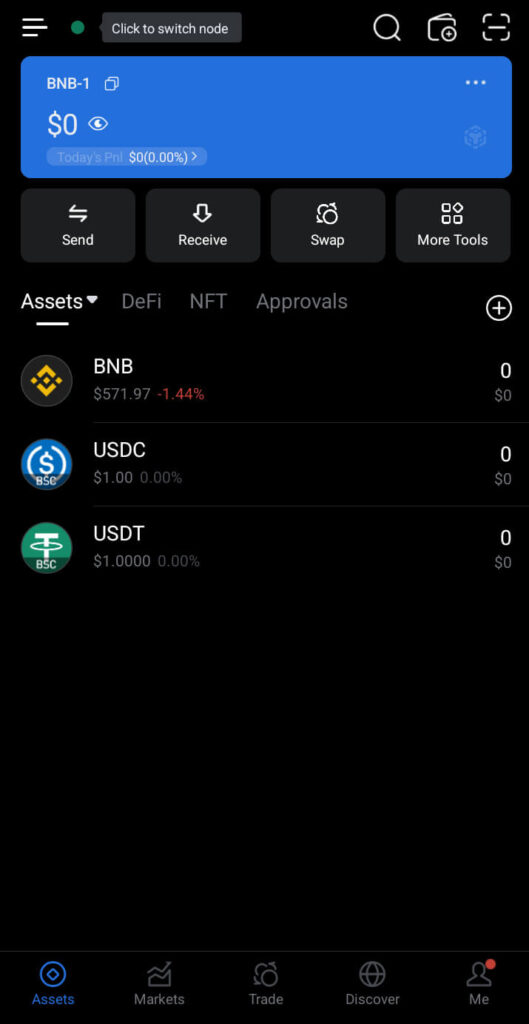
If this is your first time creating a wallet, a quick onboarding guide might pop up.
Just tap through the prompts to complete it. Your wallet is now ready!
[STEP 3] Prepare BNB
You will need a small amount of BNB to cover network transaction fees (commonly known as "gas fees").
Log into the BitradeX account you created in Step 1 to prepare your crypto assets, which you will then trade for BNB.
You can prepare funds by choosing "Buy USDT with Credit Card."
Please refer to the article below if you wish to purchase USDT using a credit card.
How to Buy Crypto with a Credit Card on BitradeX:A Step-by-Step Guide
Learn how to buy crypto on BitradeX using a credit card with our easy, step-by-step guide. Skip complex transfers and get USDT in minutes to start your AiBot a…
Alternatively, if you already hold crypto in another exchange or wallet, you can transfer it to BitradeX.
Once you have USDT ready, go to the Spot Trading section on BitradeX and trade it for BNB.
You only need a small amount—around $10 USD worth (approx. 0.01 BNB) is more than enough.
Next, send that BNB to your TP Wallet.
Open your TP Wallet and tap "BNB."
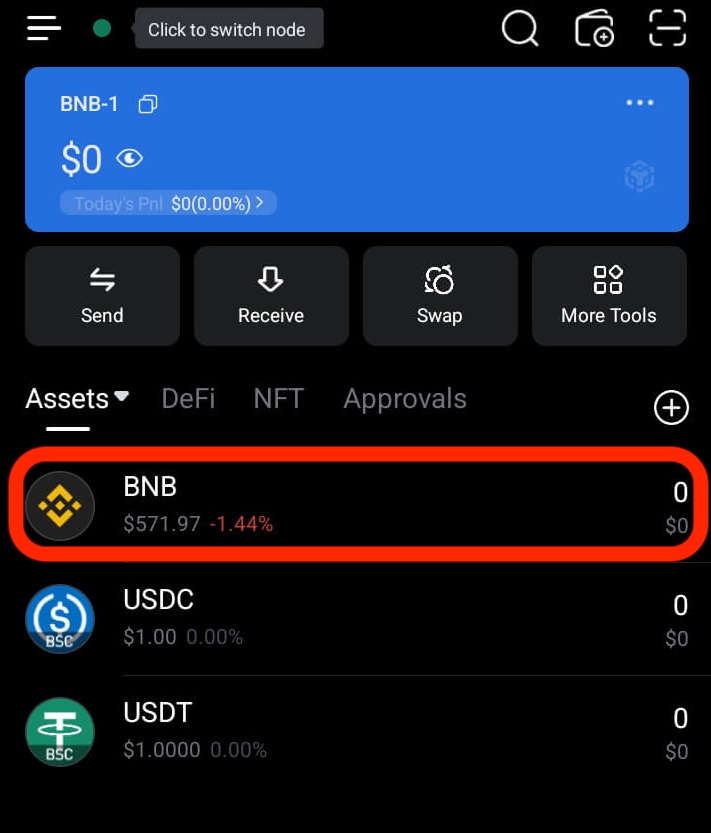
Tap "Receive" (the wording may vary slightly depending on your device).
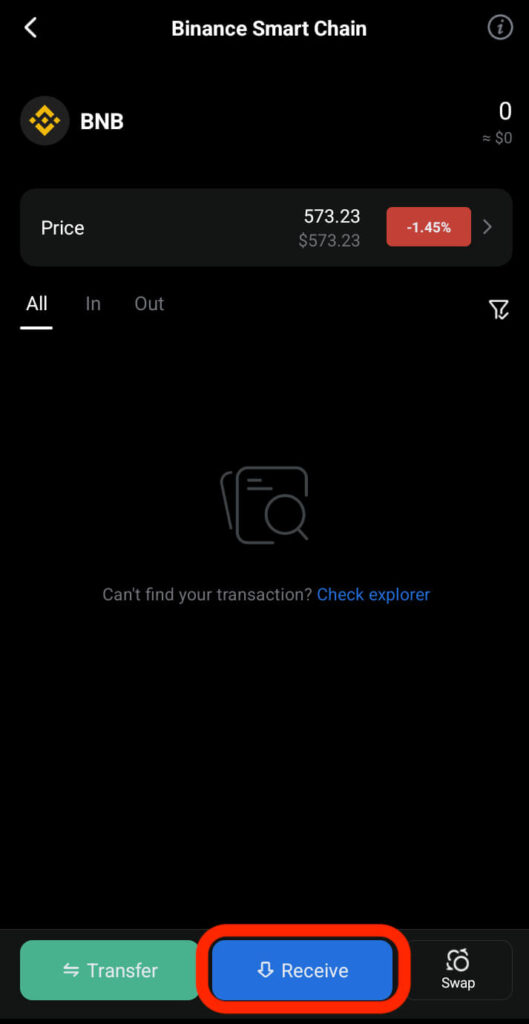
Your unique QR code and receiving address will appear.
Copy the receiving address by tapping the "Copy" button at the bottom.
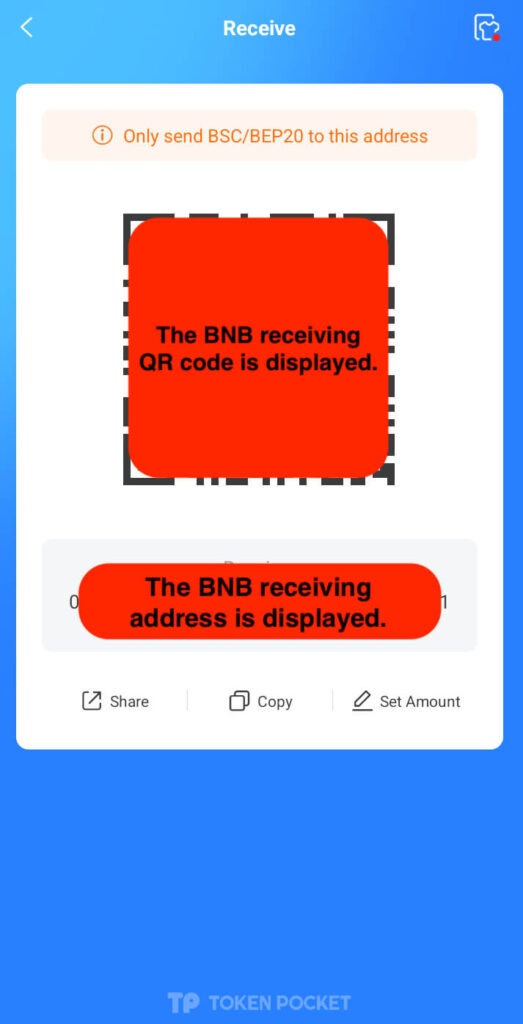
Go to the withdrawal screen on your crypto exchange (BitradeX), paste this address, and execute the transfer.
[STEP 4] Connect to JBank via the Invitation Link
Once the BNB arrives in your mobile wallet, you can use the invitation link to link your wallet with JBank.
Open your TP Wallet and tap "Discover" at the bottom right of the screen.
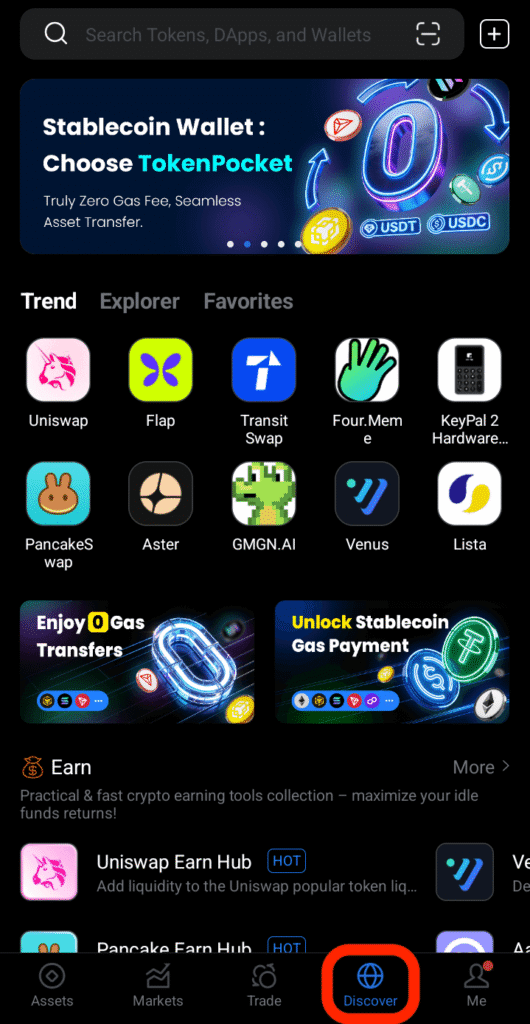
Copy the invitation URL below and paste it into the search bar at the top of the screen:
https://jbank.pro/invite?referrer=0xc93f41B095525314bbDD0e31de2d3B5Dd513FE81
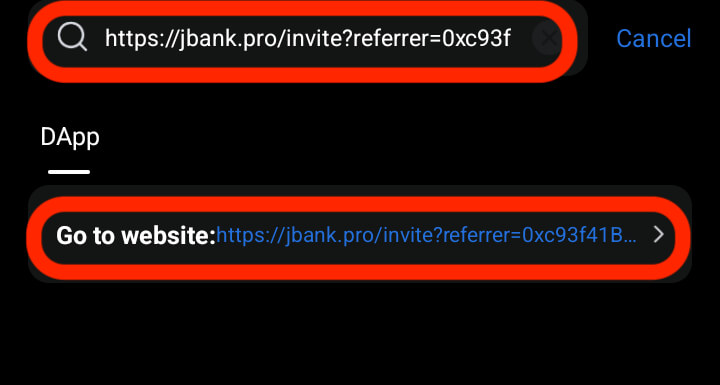
Once entered, tap "Go to website" (or press enter) to access JBank.
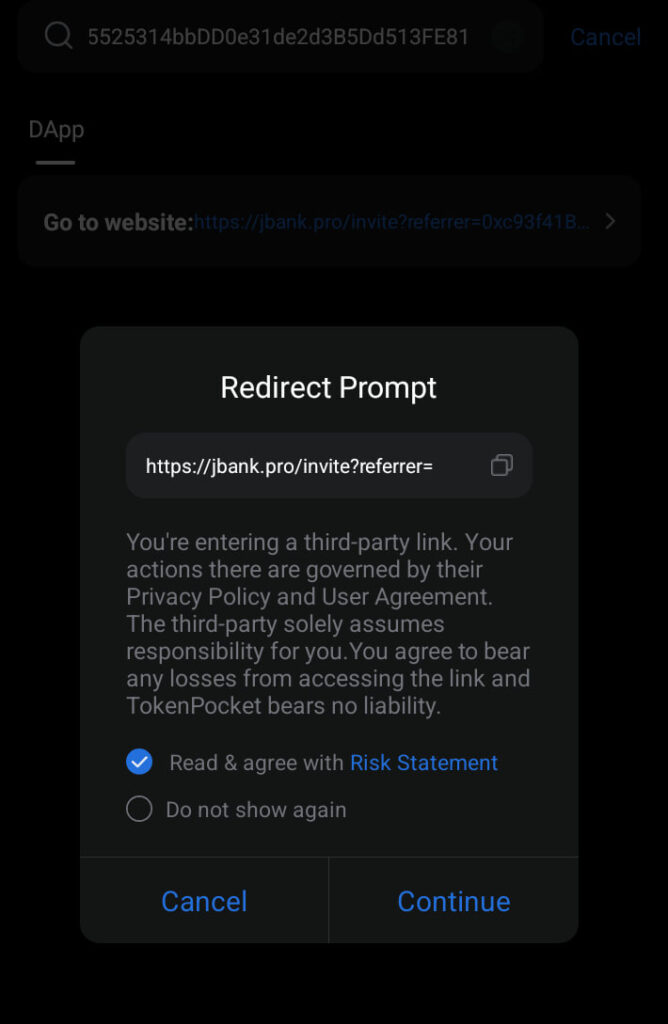
If a warning pops up asking if it's okay to visit an external site, tap "Continue."
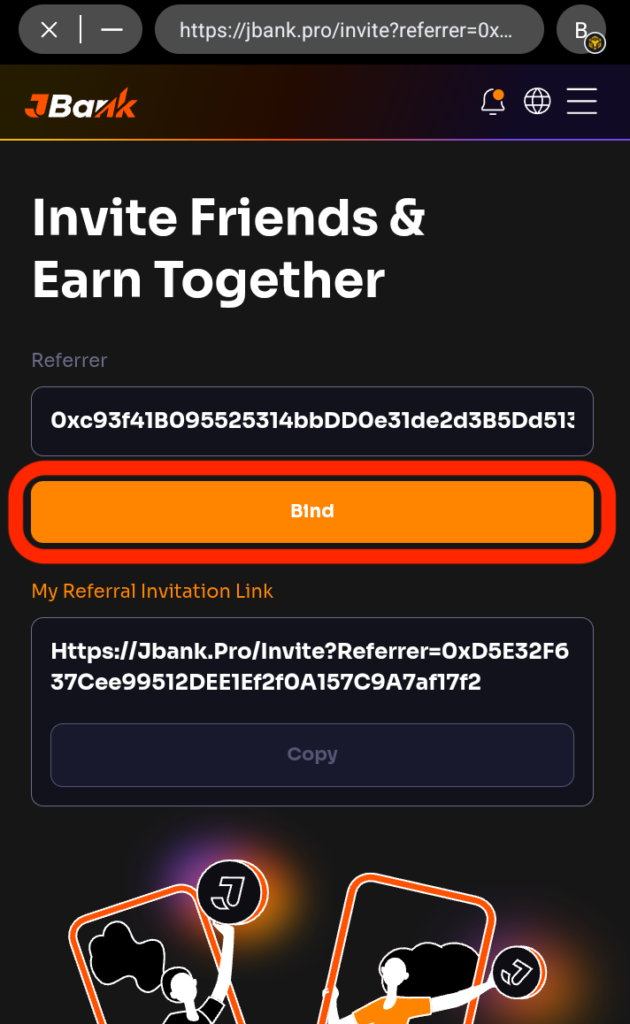
Tap the "Bind" button on the page, and select "Confirm/Done" on the confirmation pop-up.
An event request screen will appear showing that a tiny fraction of BNB will be deducted as a gas fee.
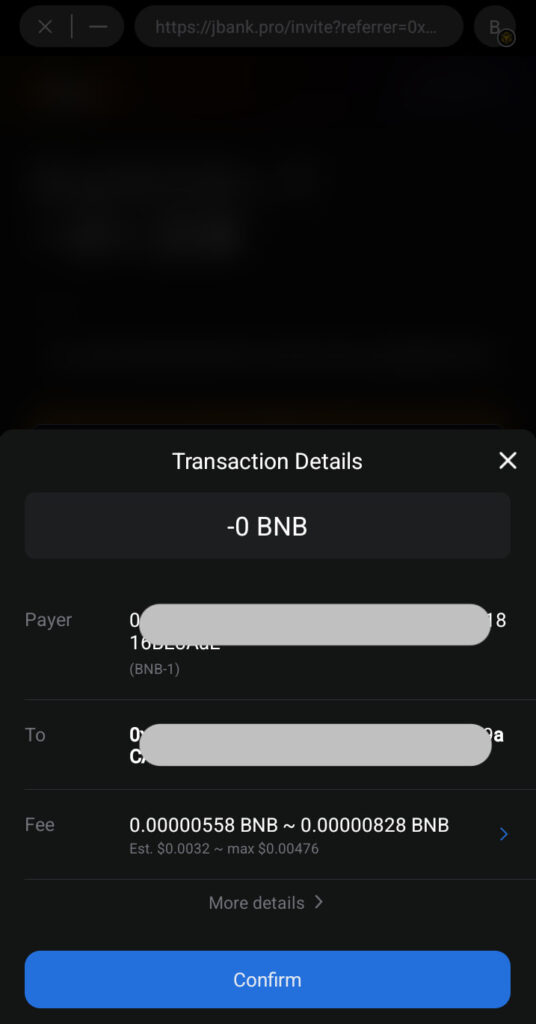
Tap "Confirm," and you will be prompted to enter your TP Wallet password.
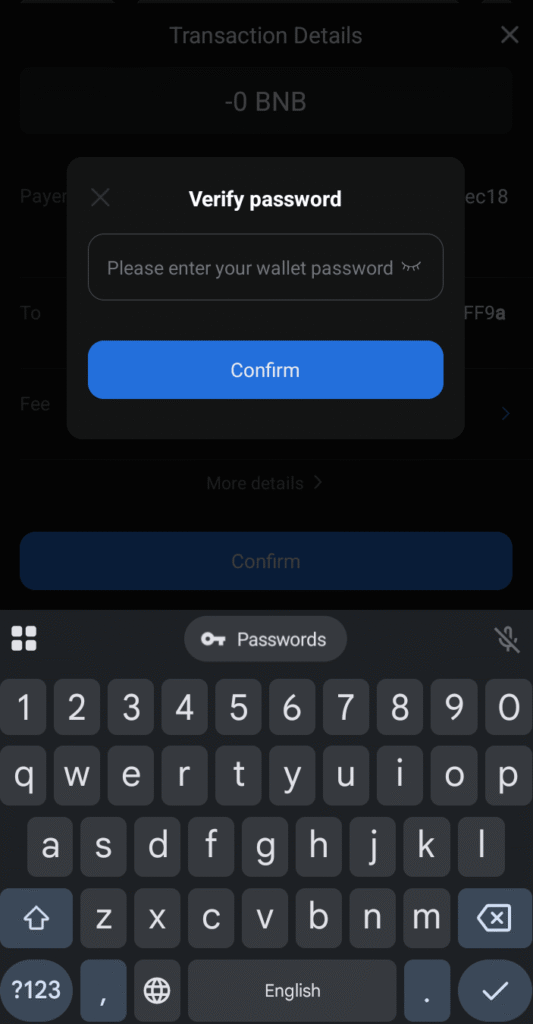
Enter your password, wait a few seconds for the network to process, and your wallet integration is successful!
Now your wallet is securely connected to JBank. Next up, let's prepare your staking capital.
[STEP 5] Deposit USDT (Staking Funds) into Your Wallet
Now, transfer the total amount of USDT you wish to stake into your TP Wallet.
Following the exact same logic as STEP 3, prepare your desired amount of USDT on BitradeX.
Copy your USDT receiving address from your TP Wallet, paste it into the withdrawal section of BitradeX, and send the funds over.
[STEP 6] Swap USDT for JUP and Start Staking!
This is the final stretch! We will now convert your USDT into JBank's native coin (JUP) and begin staking.
In your TP Wallet, tap "Discover."
Enter [https://jbank.pro/](https://jbank.pro/) in the top search bar to go to the main JBank platform.
Tap the Menu icon (the three horizontal lines in the top right corner).
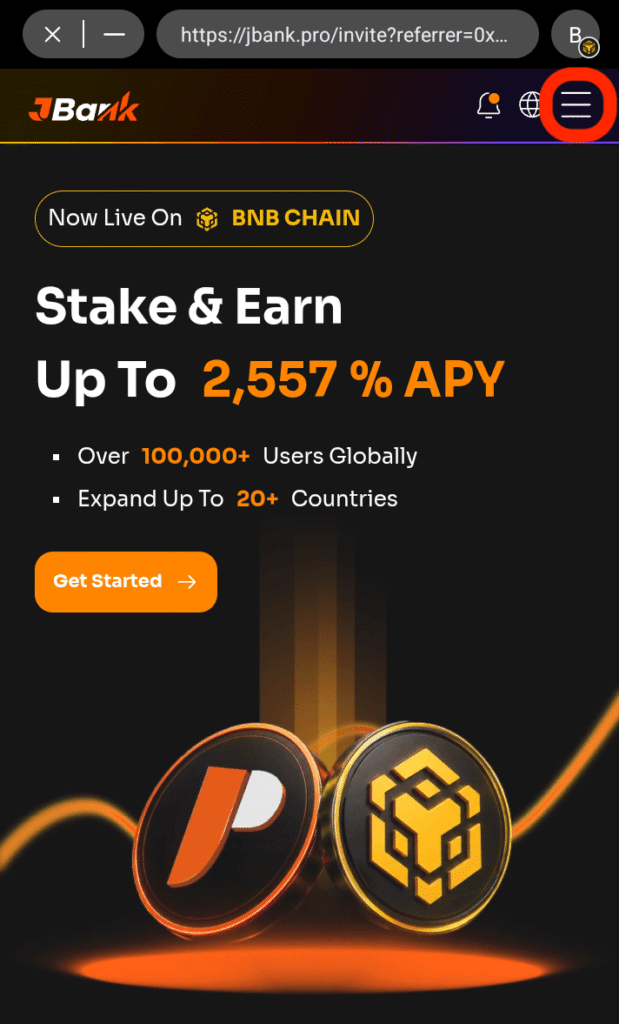
Select "Swap."
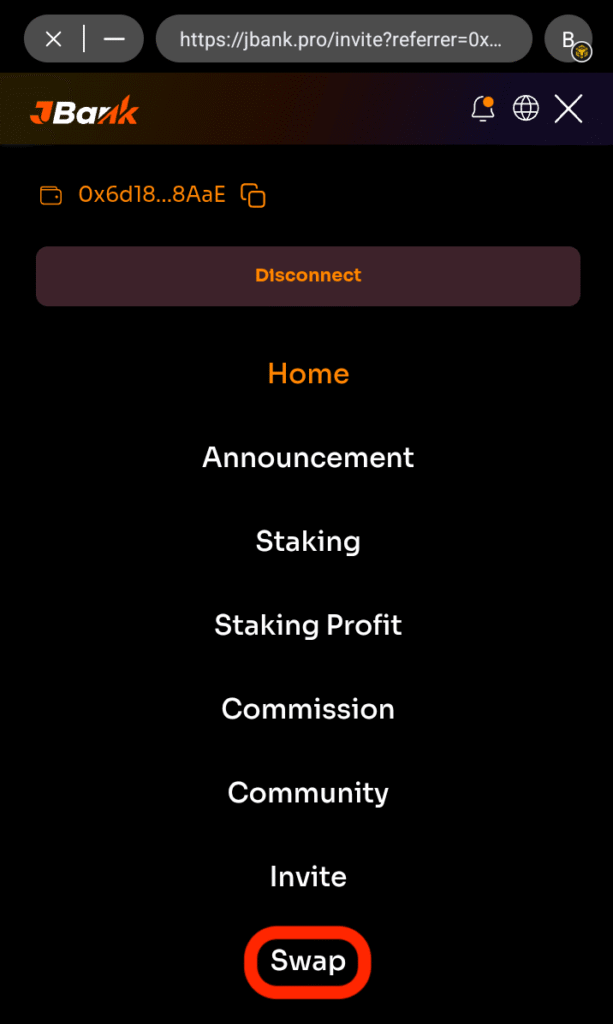
Enter the amount of USDT you want to stake and follow the prompts to complete the swap.
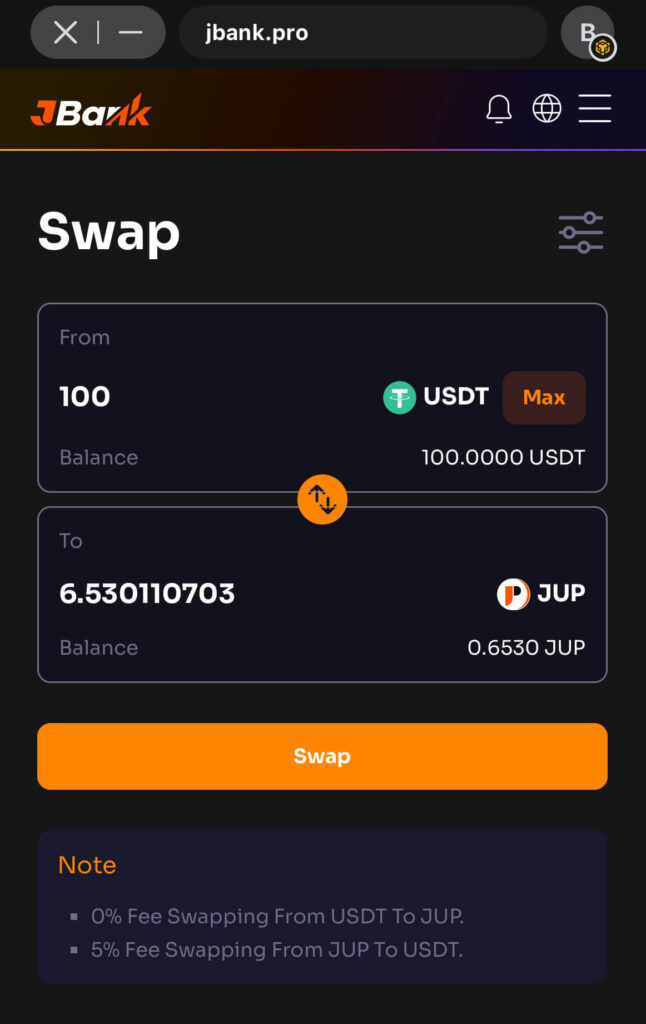
Tap "Swap"
When the confirmation screen appears, tap "Confirm."
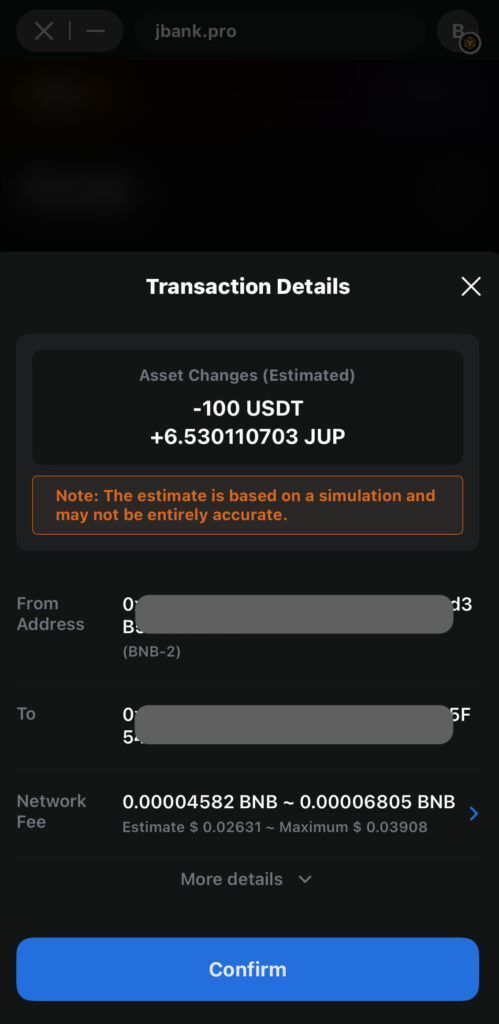
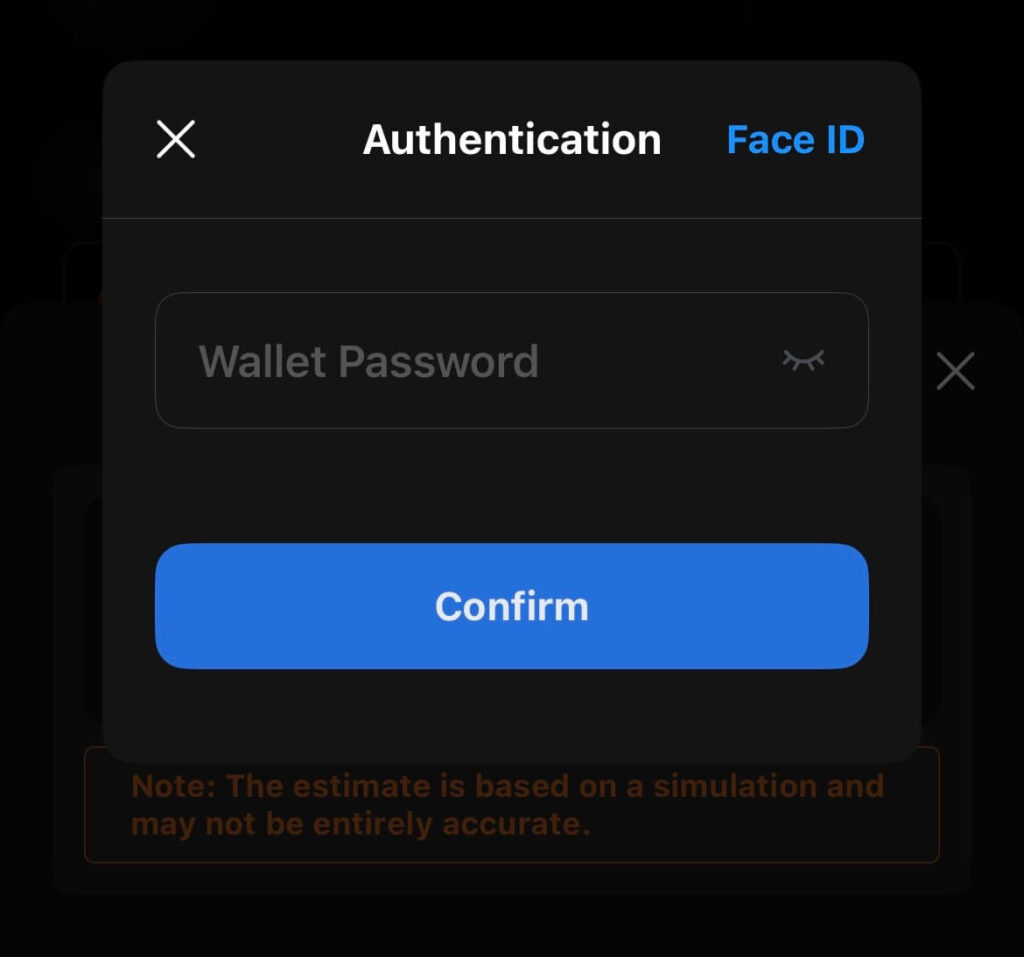
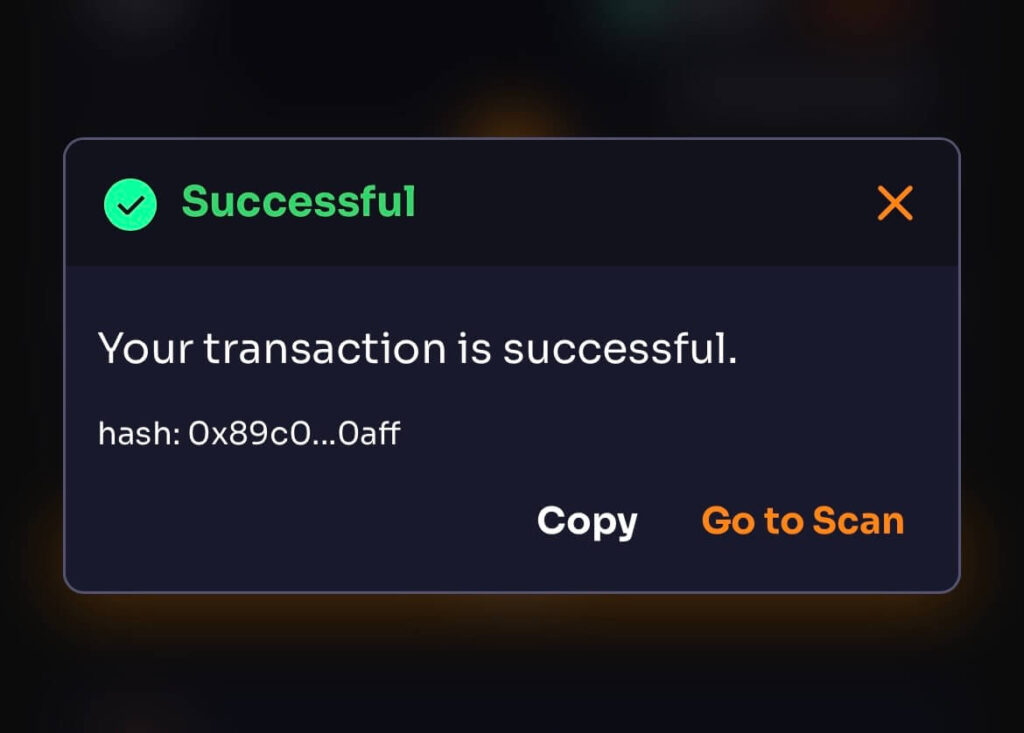
Next, go back to the menu and tap "Staking."
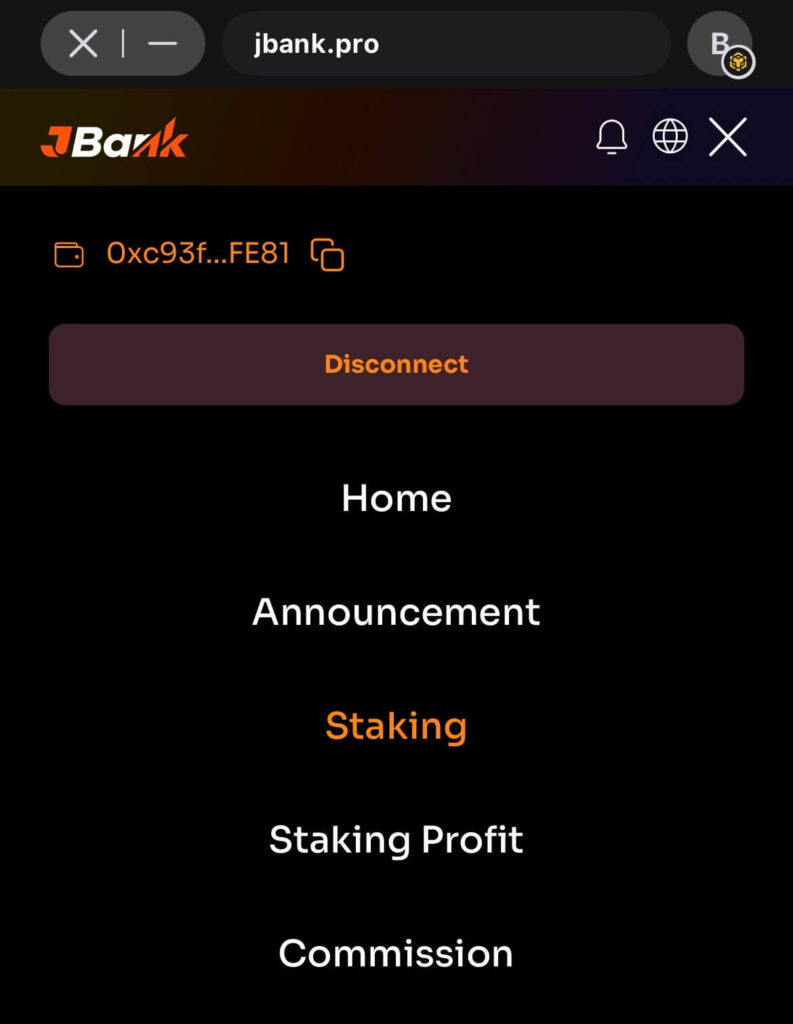
Scroll down to find the lock-up period tabs: "365 Days," "180 Days," and "Flexible."
Tap your preferred option, then manually input the amount you want to stake or simply tap "Max."
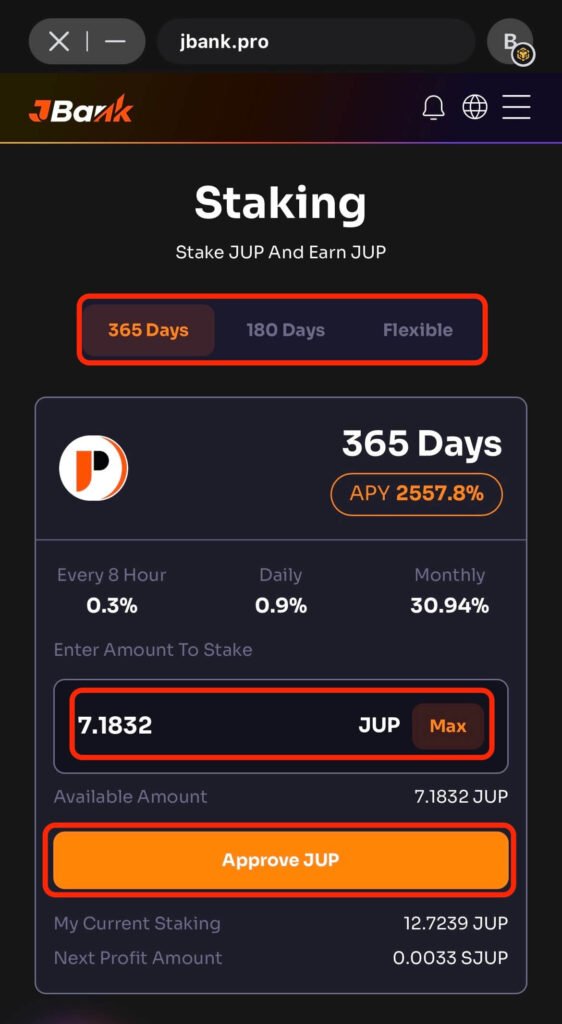
Tap "Approve JUP" and complete the final transaction prompt.
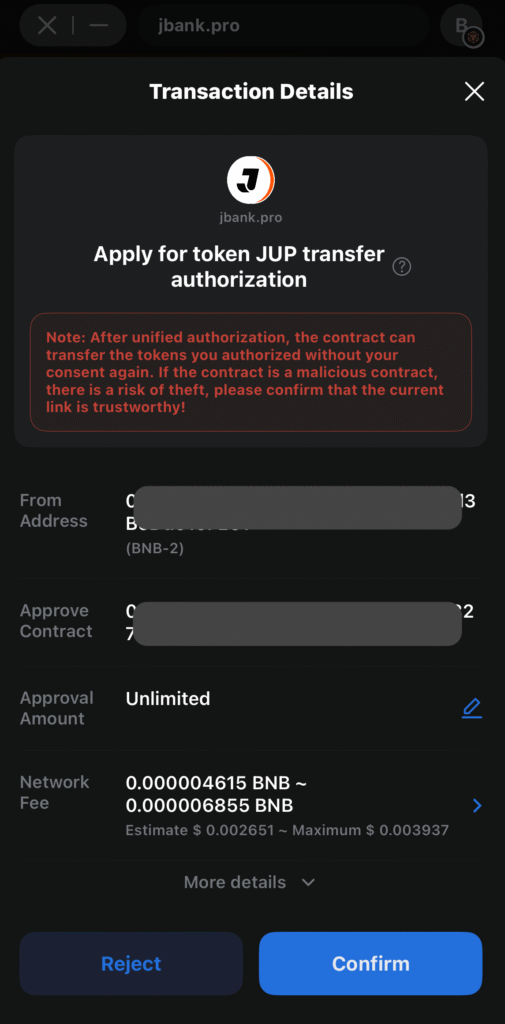
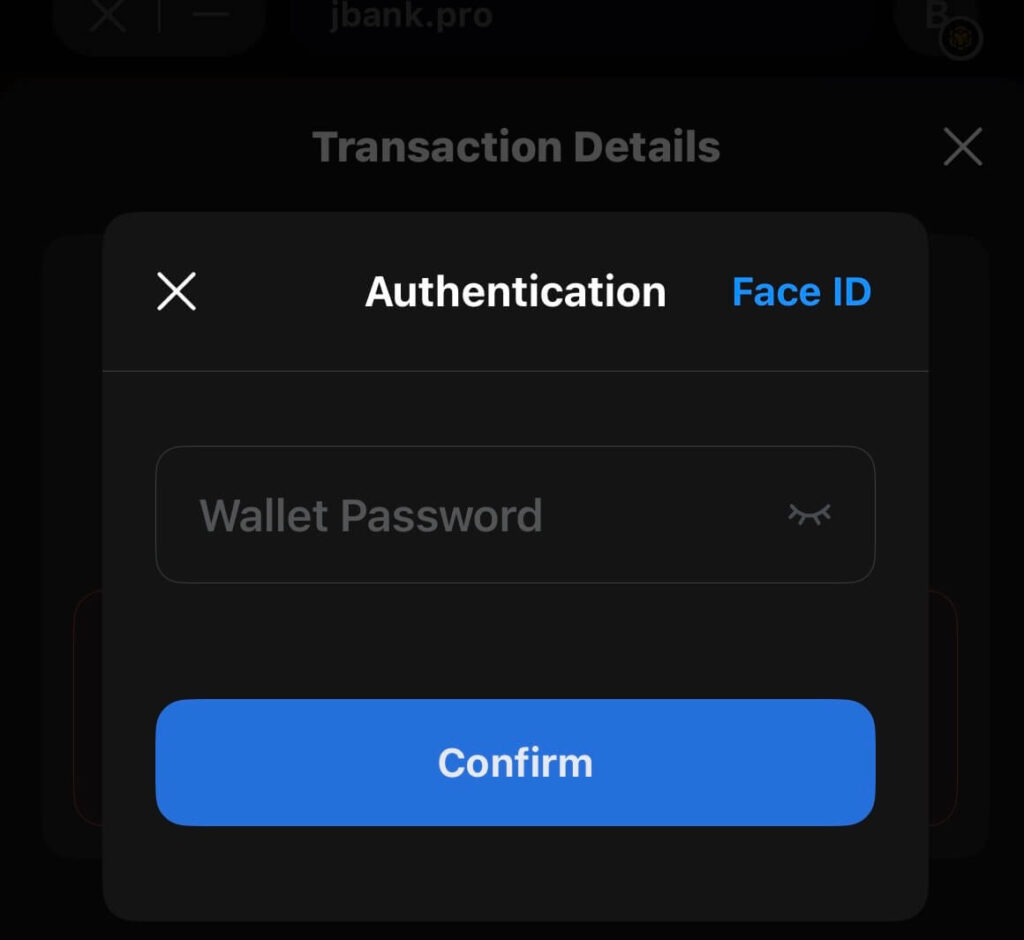
Your staking process is officially complete!
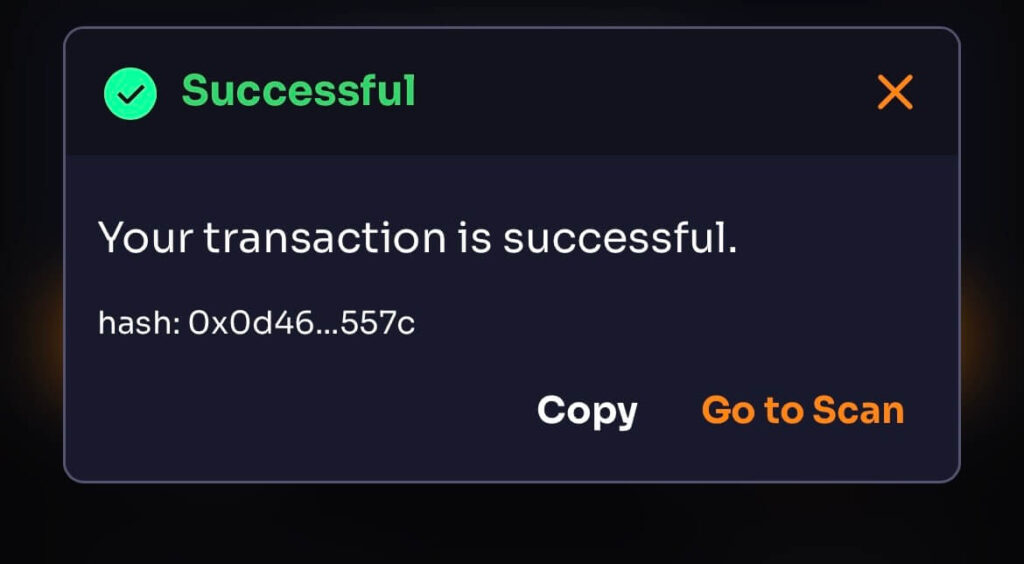
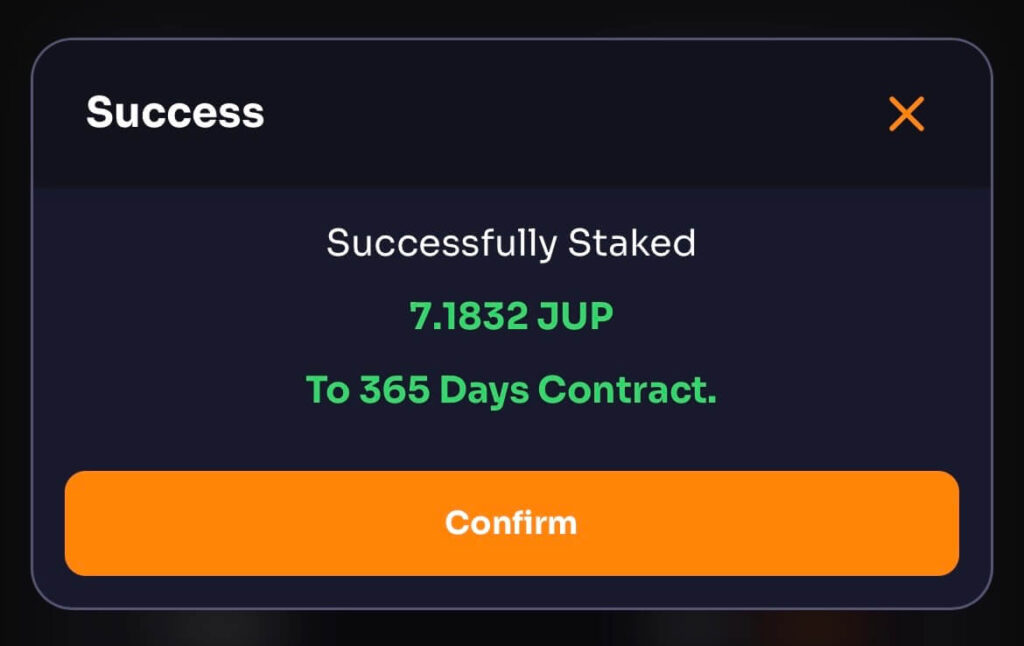
You can check your current status, staked assets, and accumulated earnings at any time by visiting the "Staking" page from the main menu.
📈 Note: The popular 365-day plan offers an incredibly attractive yield of 0.3% every 8 hours (which adds up to 0.9% per day). Sit back and enjoy watching your rewards pile up!
Key Points and Risks of JBank Staking
As a platform gaining massive attention as a "Web3 Bank," here are the core benefits of JBank staking, along with key strategies to grow your assets and risks to keep in mind.
2 Major Benefits of JBank Staking
- 24/7 Continuous Compounding
Rewards 3 Times a Day JBank staking rewards are distributed three times a day (at fixed intervals such as 1:00, 9:00, and 17:00). By consistently re-staking these rewards, you can leverage the power of compound interest to maximize asset growth. - Accelerated Growth via Community Rewards
In addition to your personal staking yields, JBank features a powerful community referral program. By strategically connecting with friends and peers, you can scale your earnings at a speed that is impossible through solo staking alone.
Important Considerations Before You Start
- Understanding Price Volatility Risks
The "JUP coin" used for staking is a cryptocurrency, meaning its market value can fluctuate. While the JBank ecosystem implements specific price stabilization mechanisms (aiming to keep it stable within ranges like $8 to $12), the golden rule of crypto applies: only invest funds that you can afford to risk.
🎁 Exclusive Invitation Link & Starter Bonuses
To help you kickstart your JBank journey smoothly and profitably, we have put together an exclusive bonus package!
⚠️ Note on Using the Invitation URL
Sometimes, opening the invitation link directly in a standard smartphone browser (like Safari or Chrome) breaks the contract connection. To ensure it works perfectly, copy the URL below and paste it directly into the built-in browser inside your TP Wallet app.
✨ Exclusive Bonus Benefits
If you register using our exclusive referral link, you will receive the following perks entirely free:
- One-on-One Personalized Support
until your staking is completely set up. - Free BNB (Gas Fees) Gift
sent to your wallet to save you the hassle and cost of buying small amounts of BNB just to get started! - An invitation to our exclusive community group chat.
[JBank Invitation URL]https://jbank.pro/invite?referrer=0xc93f41B095525314bbDD0e31de2d3B5Dd513FE81
Claim Your Support & Free BNB Here
If you feel worried about managing the steps alone, or if you are ready to claim your starter BNB coins, please reach out to us. Our dedicated team will happily walk you through the process:
If you wish to contact us via WhatsApp, please click the button below.
If you wish to contact us via WhatsApp, please scan the QR code below.
Please click the button below to contact us via email.
Let's turn the "complicated" into "confident" and start building your next-generation passive income portfolio together!
\ Get the latest news /